Essential Cake Decorating Tools for Beginners
- Posted on
The artistry of cake decorating transforms simple baked goods into stunning centerpieces that become memorable parts of celebrations. Whether you're preparing birthday cakes for family, contributing desserts to gatherings, or exploring a new creative hobby, cake decorating offers satisfying opportunities to express yourself through edible art. While professional cake decorators possess vast collections of specialized equipment, beginners need surprisingly few tools to create impressive, bakery-quality designs.
Understanding which tools are truly essential versus merely nice-to-have saves money, storage space, and the overwhelm that comes from facing too many options before developing fundamental skills. This comprehensive guide walks you through the must-have cake decorating tools for beginners, explaining what each tool does, why it matters, and how to use it effectively as you build your decorating capabilities.
Starting With the Right Mindset
Before purchasing any tools, recognize that cake decorating skills develop gradually through practice. Even with premium equipment, your first attempts won't match professional results—and that's perfectly normal. The tools featured in this guide enable learning and skill development while delivering results impressive enough to wow friends and family. As your abilities advance, you can expand your collection with specialized implements, but these essentials provide everything needed to create beautiful decorated cakes.
Quality matters more than quantity. A few well-made tools that perform reliably prove far more valuable than drawers full of cheap implements that frustrate rather than facilitate. Invest in decent quality basics that will serve you through years of learning and creating.
Frosting Application Tools
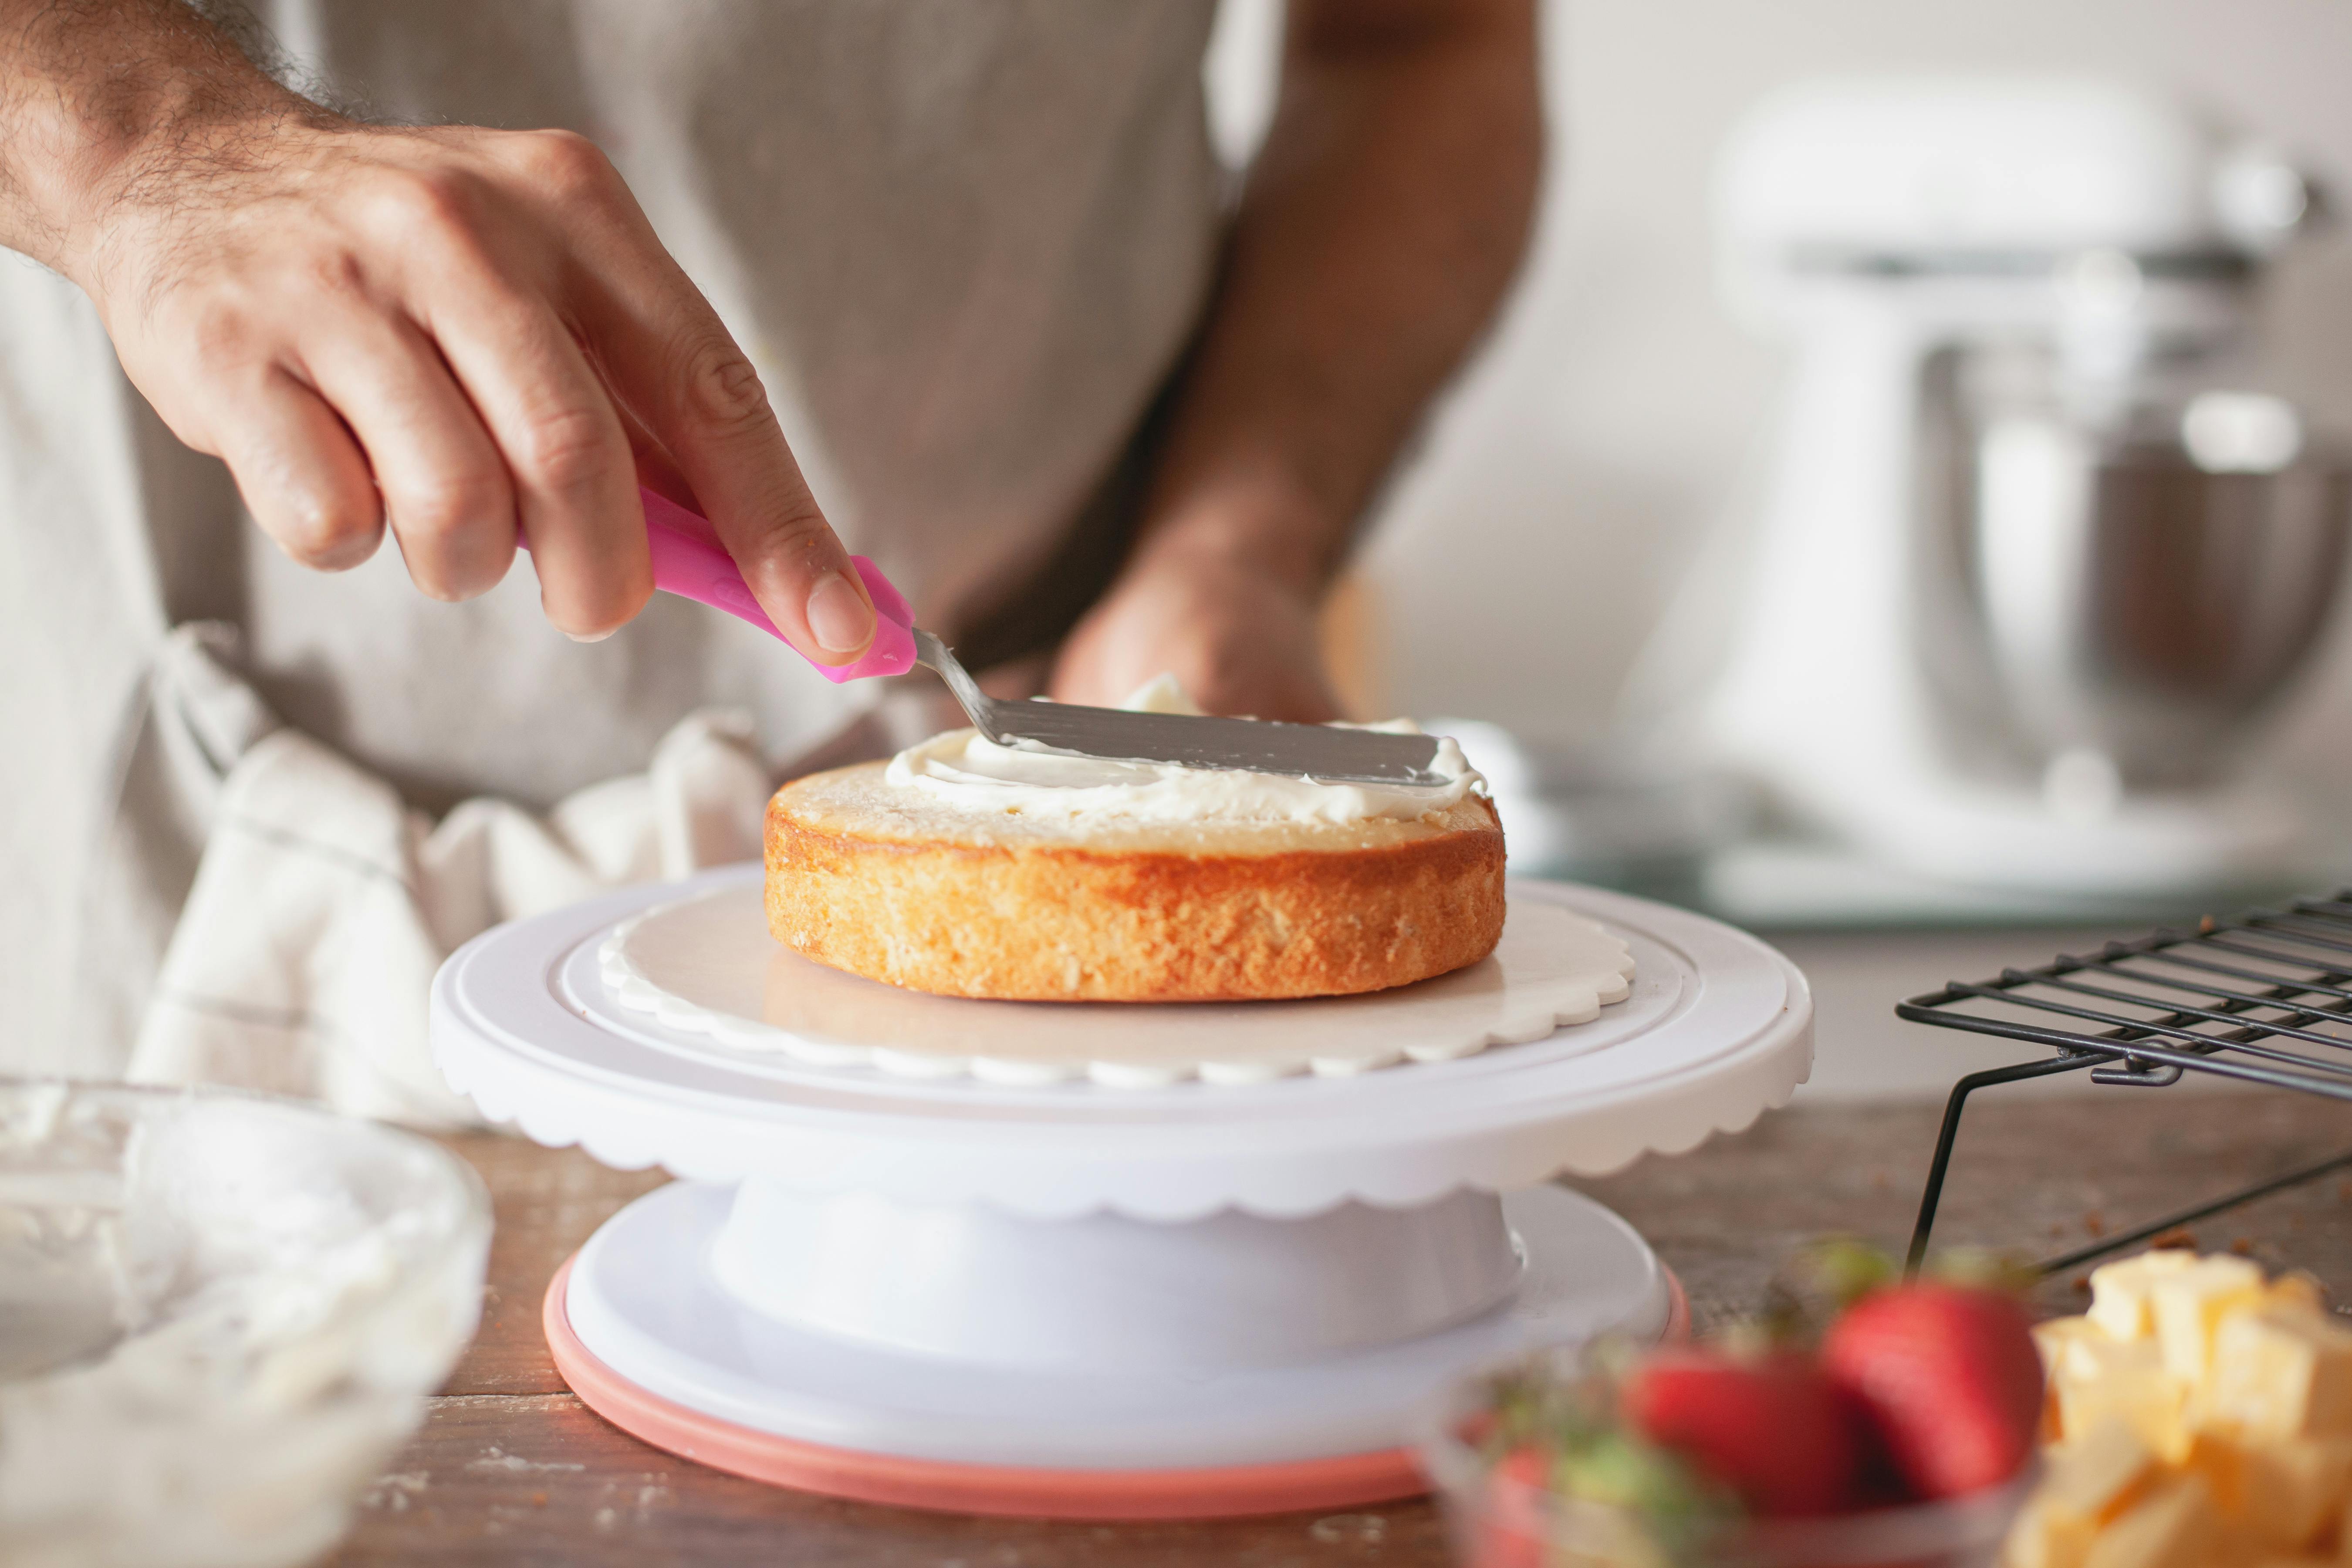
Offset Spatulas
The offset spatula stands as the single most essential cake decorating tool. This angled blade allows you to spread frosting smoothly across cake surfaces while keeping your hand positioned above the work, preventing accidental contact with freshly frosted areas. The offset angle provides leverage for achieving even, professional-looking frosting layers.
Beginners should own at least two offset spatulas: a large one (8-10 inches) for frosting cake sides and tops, and a small one (4-6 inches) for detail work, smoothing small areas, and handling cupcakes. The large spatula covers broad surfaces efficiently, while the small spatula offers precision for tight spaces and intricate work.
Quality offset spatulas feature flexible but sturdy blades that bend slightly under pressure without flopping uselessly. Comfortable handles with secure grips prevent hand fatigue during extended decorating sessions. Stainless steel blades clean easily and resist staining from colored frosting.
The technique for using offset spatulas seems simple but requires practice. Load frosting onto the blade, position it against the cake at a slight angle, and draw it smoothly across the surface with consistent pressure. The key is working in smooth, decisive motions rather than repeatedly patching and re-smoothing the same areas.
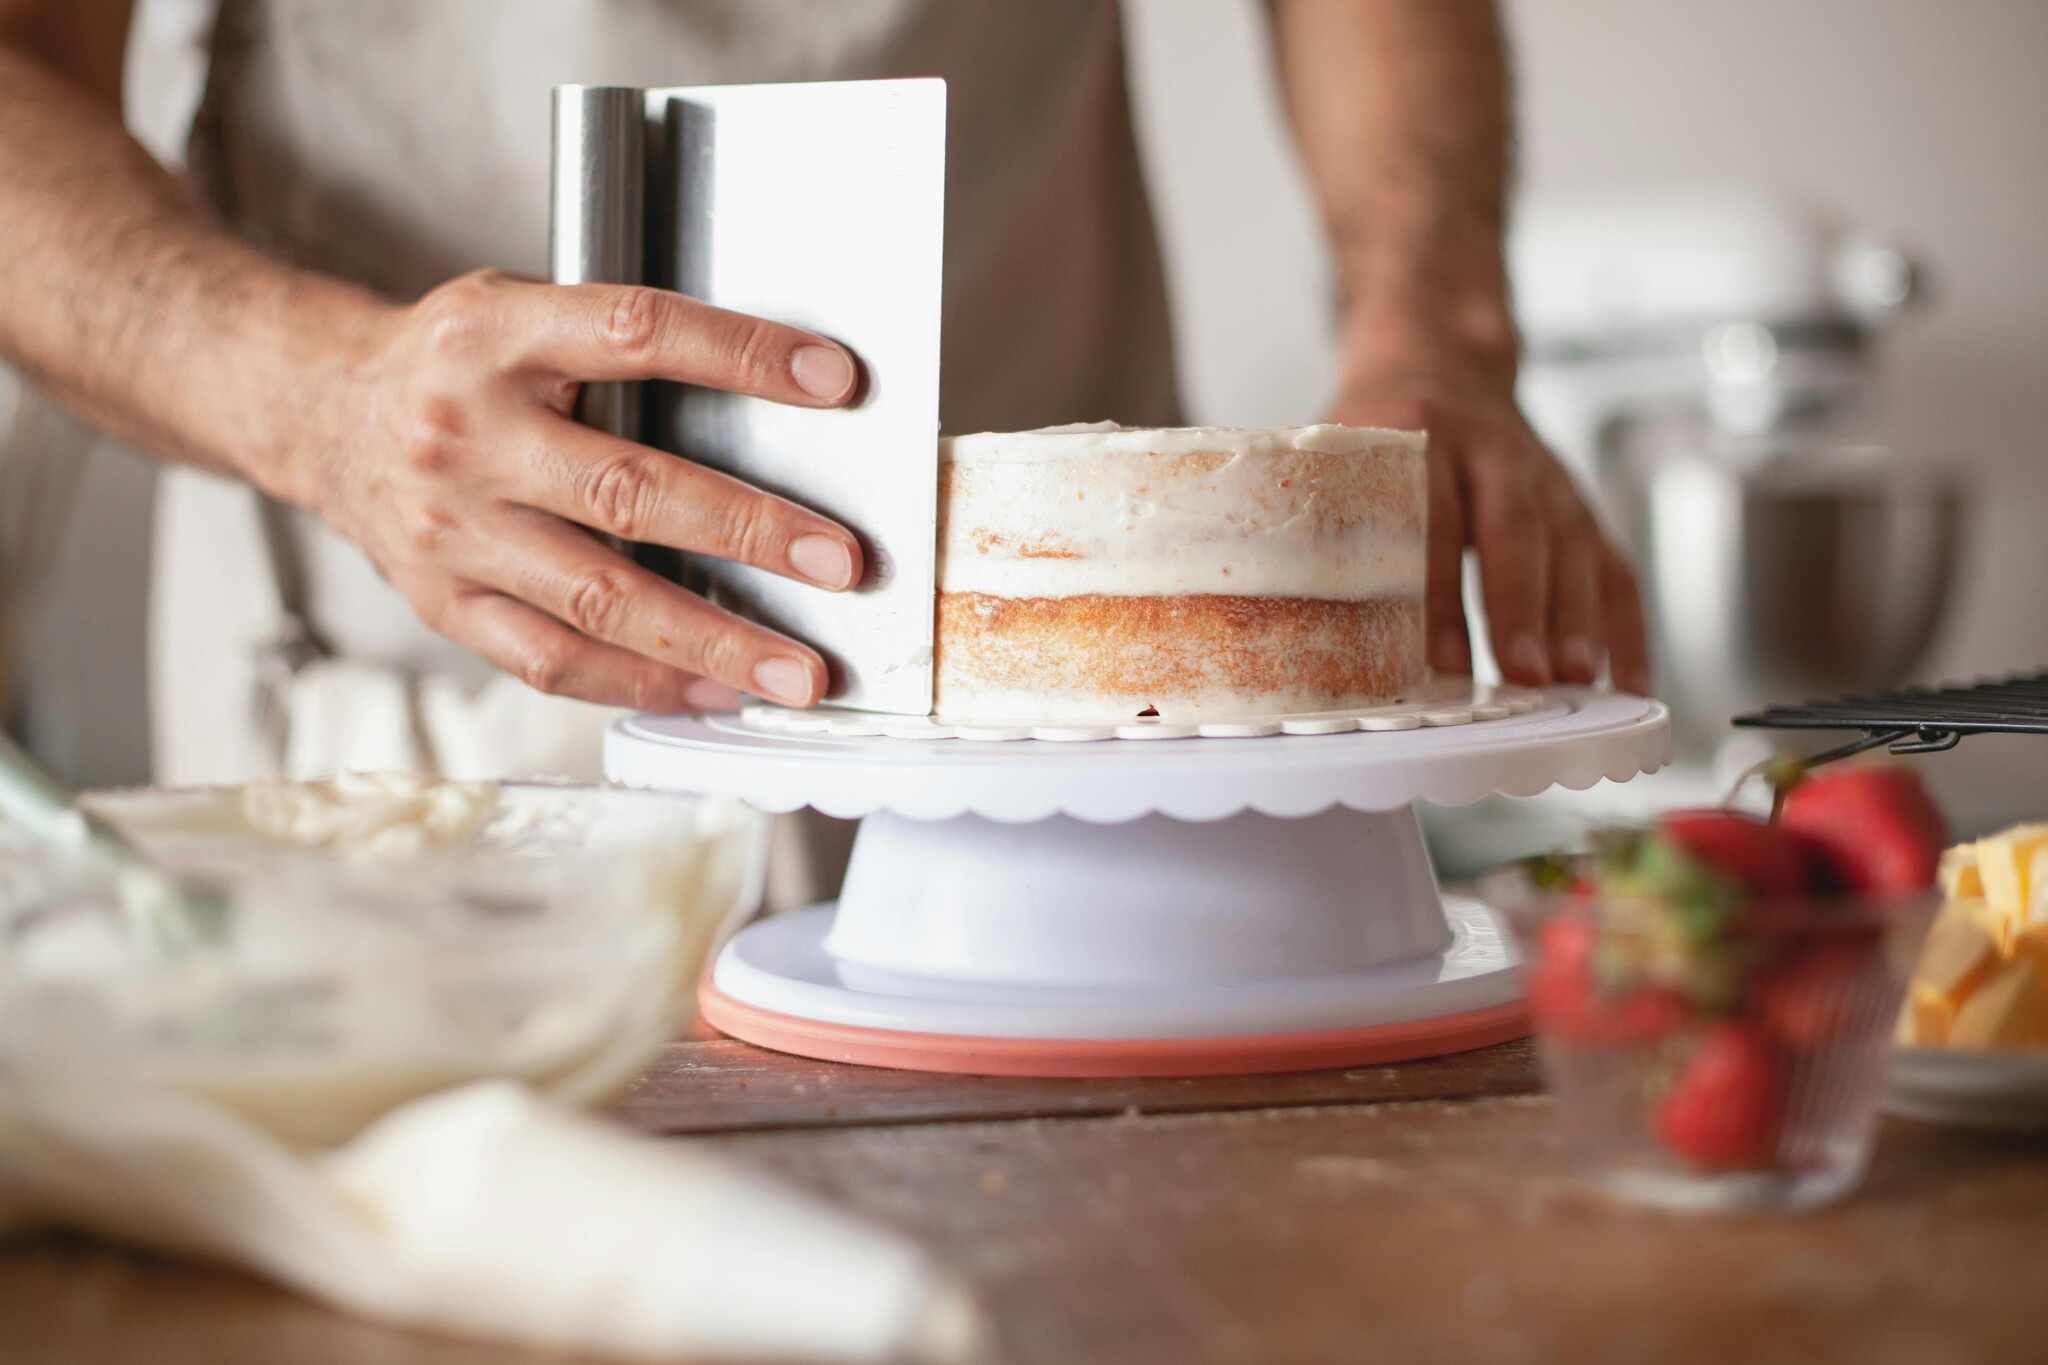
Bench Scraper or Icing Smoother
After applying frosting with offset spatulas, bench scrapers or specialized icing smoothers create the perfectly smooth, professional finish that distinguishes amateur from accomplished work. These flat, rigid tools scrape excess frosting away while leveling surfaces to uniform smoothness.
For beginners, metal bench scrapers work beautifully and cost just a few dollars. Hold the scraper perpendicular to the cake side while slowly rotating the cake turntable, allowing the straight edge to remove excess frosting and create smooth, even surfaces. The same tool smooths cake tops by drawing it across the surface with consistent pressure.
Specialized icing smoothers feature comfortable handles and edges specifically designed for cake finishing, but bench scrapers accomplish the same results at lower cost. As your skills develop, you might appreciate dedicated smoothers, but bench scrapers serve beginners perfectly while offering utility for other kitchen tasks.
Cake Turntable
Rotating cake turntables revolutionize frosting application and decorating. These elevated, rotating platforms allow you to spin cakes smoothly while your spatula remains stationary, creating even frosting layers far more easily than working around stationary cakes. The elevation also reduces back strain by bringing work surfaces closer to comfortable height.
Basic turntables with smooth-spinning mechanisms and stable bases cost $15-30 and deliver years of reliable service. Professional-grade turntables with ball-bearing mechanisms and heavier construction offer smoother rotation but aren't necessary for beginners. Some turntables feature non-slip surfaces that grip cake boards, preventing sliding during decoration.
The turntable's value becomes immediately apparent in use. Frosting cake sides becomes a simple process: hold your loaded spatula against the side at consistent angle and height while smoothly rotating the turntable with your other hand. The cake spins past the stationary spatula, receiving even frosting coverage automatically.
Piping Equipment
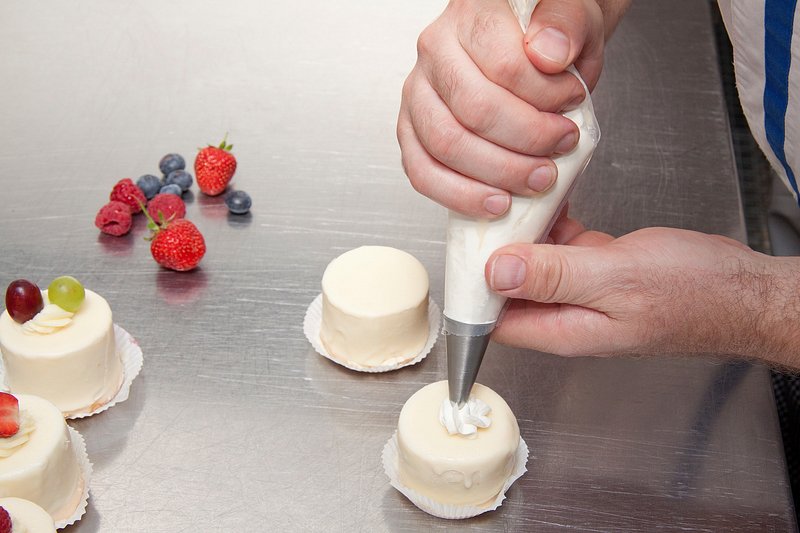
Piping Bags
Piping bags—cone-shaped bags for holding frosting and controlling its application—enable the decorative piping work that transforms basic frosted cakes into artistic creations. Beginners face a choice between disposable plastic bags and reusable cloth or silicone bags, each offering distinct advantages.
Disposable piping bags eliminate cleanup while offering convenience and hygiene. Use them once, discard them, and move on. The clear plastic allows you to monitor remaining frosting quantities easily. However, disposable bags create waste and require ongoing purchases.
Reusable bags reduce waste and long-term costs but require thorough washing after each use. Coated cloth bags offer good grip and durability, while silicone bags provide easy cleanup and resist staining. For beginners still exploring whether cake decorating becomes a lasting interest, starting with inexpensive disposable bags makes sense. As commitment deepens, transitioning to reusable options becomes environmentally and economically sensible.
Most piping tasks require 12-16 inch bags. Smaller bags offer better control for detail work but require more frequent refilling. Larger bags accommodate more frosting but can feel unwieldy for beginners still developing piping skills.
Piping Tips (Nozzles)
Piping tips—metal attachments fitted into piping bag openings—determine the shapes and patterns frosting creates when piped. While hundreds of specialized tips exist, beginners need only a small starter collection to create impressive variety.
Essential tips for beginners include:
Round Tips: Numbered tips like #3, #5, and #12 create dots, beads, outlines, writing, and basic decorations. These versatile tips handle countless applications.
Star Tips: Open and closed star tips like #16, #18, and #21 create rosettes, shells, borders, and textured decorations. Star tips are workhorses for creating visual interest quickly.
Petal Tips: Tips like #104 form flower petals, ruffles, and bows. While slightly more specialized, petal tips unlock floral decorations that elevate cake aesthetics dramatically.
Leaf Tips: Tips like #352 create realistic leaves and foliage to accompany piped flowers.
Rather than buying hundreds of individual tips, purchase small beginner sets containing 10-15 essential tips. These sets include the most commonly used tips at significant cost savings compared to individual purchases. As you gain experience and identify favorite techniques, you can add specialized tips to your collection.
Quality piping tips feature seamless stainless steel construction with precisely shaped openings. Cheap tips with rough edges or irregular openings produce inconsistent results that frustrate beginners attempting to learn proper techniques.
Tip Couplers
Couplers allow you to change piping tips without changing bags, saving time and reducing frosting waste. These two-piece plastic devices consist of a base that fits inside the piping bag and a ring that screws over the tip, securing it to the base. To change tips, simply unscrew the ring, swap tips, and screw the ring back on.
Without couplers, you'd need separate piping bags for each tip, or you'd waste time and frosting by emptying bags to change tips. Couplers cost just a few dollars and dramatically improve workflow efficiency. Purchase several so you can have multiple bags prepared with different colored frostings, each ready for quick tip changes.
Supporting Equipment
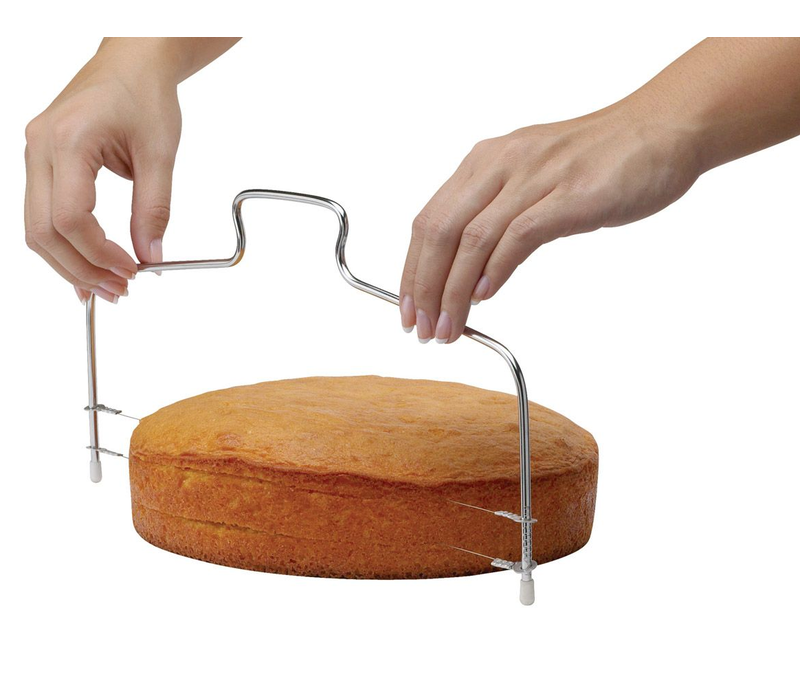
Cake Leveler
Cakes fresh from the oven feature domed tops that make stacking layers difficult and create sloped final cakes. Cake levelers—wire cutters stretched across adjustable frames—slice perfectly level layers by cutting through cakes horizontally. The adjustable height allows you to trim domes and split thick layers into thinner ones for more dramatic layered cakes.
Quality levelers feature sturdy frames that don't flex during cutting and adjustable height mechanisms that lock securely. The cutting wire should be taut and sharp enough to slice through tender cake without excessive sawing that creates crumbly cuts.
While you can level cakes with serrated knives, levelers deliver more consistent results with less waste. For beginners still developing knife skills, levelers eliminate uncertainty and frustration from this crucial step.
Cake Boards
Cake boards—sturdy cardboard or foam core circles or rectangles—provide stable bases for frosted cakes, making them easier to handle, transport, and display. The boards support cake weight, prevent sagging, and create professional presentation. They also facilitate turntable use by providing something to grip when positioning cakes.
Purchase boards matching your most common cake sizes. For home bakers, 8-inch and 9-inch rounds cover most applications. Some decorators use boards slightly larger than cakes to create borders, while others prefer boards exactly matching cake diameters for cleaner presentation.
Cake boards covered in decorative foil add polished appearance, though plain boards work fine for cakes that will sit on decorative plates or stands.
Decorating Comb or Scraper Set
Decorating combs—scrapers with patterned edges—create textured designs in frosting. After applying smooth frosting layer, hold a patterned comb against the cake side while rotating the turntable, creating vertical lines, waves, or other patterns. These simple tools produce impressive effects with minimal skill required.
Comb sets typically include multiple edge patterns in one tool, offering variety without requiring multiple purchases. The instant visual impact makes decorating combs excellent tools for beginners who want impressive results before developing advanced piping skills.
Measurement and Prep Tools

Kitchen Scale
Precise ingredient measurement ensures consistent frosting consistency—critical for successful decorating. Frosting that's too stiff won't pipe smoothly, while frosting that's too thin won't hold piped shapes. Digital scales measuring in grams provide precision that volume measurements cannot match.
Beyond frosting, scales improve all baking by ensuring accurate ingredient ratios. This makes scales foundational kitchen tools rather than specialized decorating equipment, justifying their place in every baker's arsenal.
Mixing Bowls
Dedicated mixing bowls for frosting preparation prevent cross-contamination of flavors and colors. Stainless steel or glass bowls work best—they don't absorb colors or odors, clean easily, and last indefinitely. Have several sizes available for different frosting quantities.
Rubber Spatulas
Flexible rubber spatulas scrape bowls completely clean, ensuring no frosting goes to waste. They also mix coloring into frosting efficiently and transfer frosting from mixing bowls to piping bags cleanly. Quality silicone spatulas resist staining, tolerate high temperatures, and last for years.
Color and Decoration
Gel Food Coloring
Liquid food coloring from grocery stores works, but gel or paste food coloring provides more vibrant colors without thinning frosting consistency. Professional decorators use gel colors exclusively for their intensity and consistency-preserving properties.
Start with primary colors (red, yellow, blue) plus black and perhaps brown. These allow you to mix virtually any color needed. As your decorating advances, adding pre-mixed colors saves mixing time for frequently used hues.
Apply gel colors sparingly—a little goes a long way. Add small amounts, mix thoroughly, and assess color before adding more. Colors often deepen slightly as they rest, so initial mixing can appear lighter than the final result.
Toothpicks
Simple toothpicks serve multiple decorating purposes. Use them to add tiny amounts of gel coloring to frosting, pop air bubbles in freshly frosted surfaces, create texture in frosting, or sketch guidelines on frosted cakes before piping. Keep a box in your decorating supplies for these quick, frequent tasks.
Practice and Skill Development
Parchment Paper or Wax Paper
Practice piping techniques on parchment or wax paper before working on actual cakes. This allows you to develop muscle memory, test frosting consistency, and perfect techniques without risking decorated cakes. Once you're satisfied with your practice work, you can even scrape frosting off paper and return it to piping bags for use on cakes.
Practice sheets with printed piping patterns help beginners learn consistent sizing and spacing. Slide these under parchment paper and trace the patterns with frosting, developing accuracy and control.
Storage and Organization
Tool Storage
Dedicate space for decorating equipment, keeping everything together and accessible. Drawer organizers, clear containers, or portable caddies work well. Organized storage encourages decorating by eliminating the frustration of searching for scattered supplies.
Clean and dry all tools thoroughly before storage to prevent rust, staining, or bacterial growth. Pay particular attention to piping tips, ensuring all frosting residue is removed from tiny crevices.
Building Your Collection Strategically
Start with absolute essentials: offset spatulas, turntable, bench scraper, piping bags, basic tip set with coupler, and cake leveler. This foundation enables impressive decorated cakes while keeping initial investment under $75-100.
As you gain experience and identify favorite techniques, add specialized tools. Love making flowers? Invest in more petal tips and flower nails. Enjoy textured designs? Add more decorating combs. Build gradually based on actual usage rather than acquiring everything at once.
Quality tools from reputable manufacturers last years and perform reliably. Budget alternatives often frustrate rather than facilitate, creating negative experiences that discourage continued decorating. Invest wisely in proper equipment that grows with your skills.

Conclusion
Cake decorating rewards creativity, patience, and practice with beautiful results that bring joy to celebrations and pride in your accomplishments. The essential tools outlined here provide everything needed to begin your decorating journey, creating impressive cakes that friends and family will genuinely admire. From smooth frosted surfaces achieved with offset spatulas and turntables to decorative piping work created with bags and tips, these specialty tools transform basic baking skills into artistic capabilities.
Remember that tools enable technique but don't replace practice. Even professional decorators started as beginners, developing their skills through repetition, experimentation, and learning from mistakes. Embrace the learning process, celebrate your progress, and enjoy the creative satisfaction that comes from transforming simple cakes into personalized works of edible art. With essential tools in hand and commitment to practice, you'll soon be creating decorated cakes that rival bakery offerings while expressing your unique creative vision.